

Introduction
As shown in the YouTube video, it is possible to create a Micro-App in ownvia with very little effort, allowing you to automatically extract terminology from existing texts or documents quickly and easily within just a few minutes. Not only terminology candidates can be extracted, but also definitions, categorisations, translations and much more that you can imagine can be completed quickly and easily. I will briefly explain how this can be achieved in this article. I hope you enjoy reading and trying it out.
Link to the YouTube video for those who have not seen it yet: click here.
Step-by-step guide to creating the TermExtrakt Micro-App
Step 1: Open the “New Micro-App” modal
- Log in with a ownvia Basic user account
- Open the App Manager and click the “NEW MICRO-APP” button there
- The “New Micro-App” modal opens
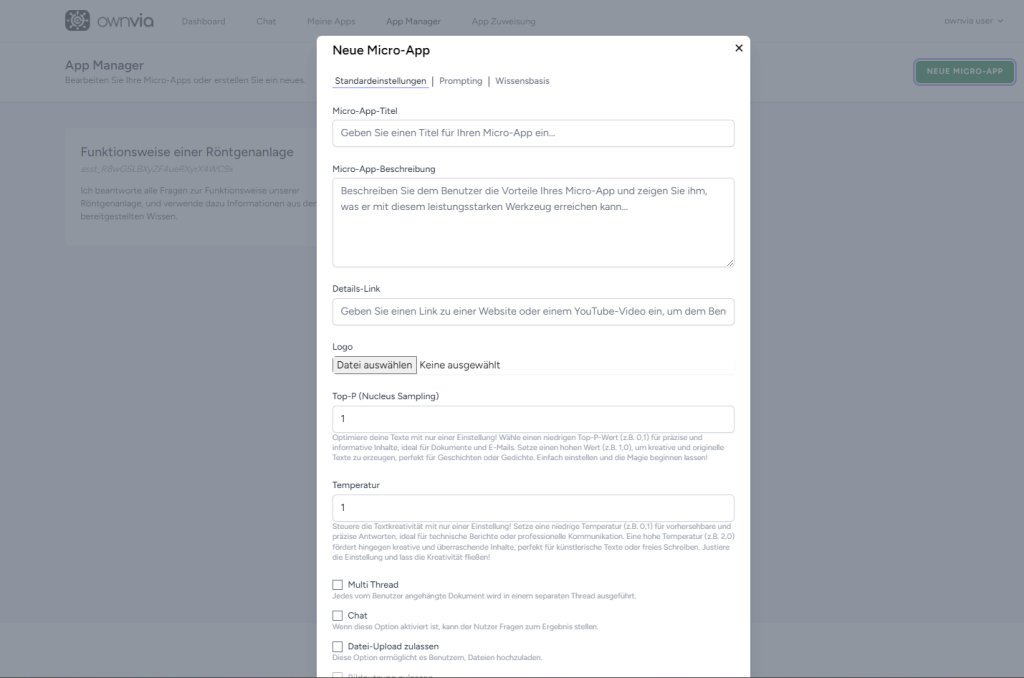
Step 2: Configure the “Default settings”
- Enter a Micro-App title such as “TermExtrakt” or any title of your choice
- Add a Micro-App description so that users understand what the Micro-App does.
- Description example: TermExtrakt is your automated terminology assistant. Simply copy your text or upload files, and TermExtrakt will automatically extract a list of 20 terms. Each term is provided with a definition and its corresponding English translations to help you use terminology accurately and consistently.
- Enable the ‘Allow file upload’ option and you have completed all the relevant default settings.
Step 3: Open the “Prompting” menu
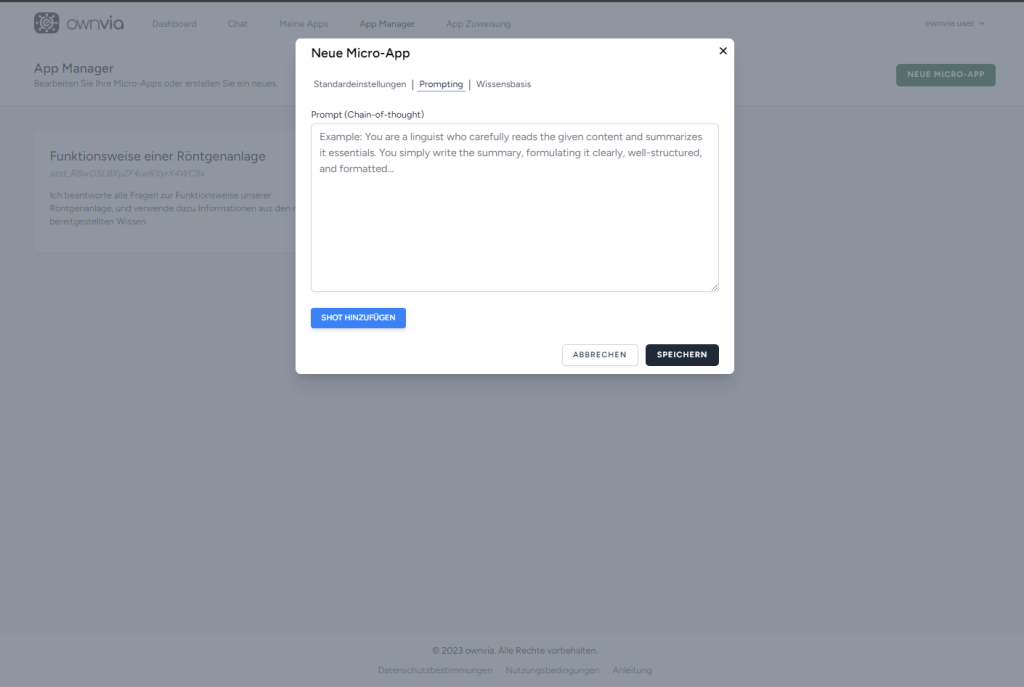
- Assign a role to the Micro-App. In our case, it is a terminology extraction expert.
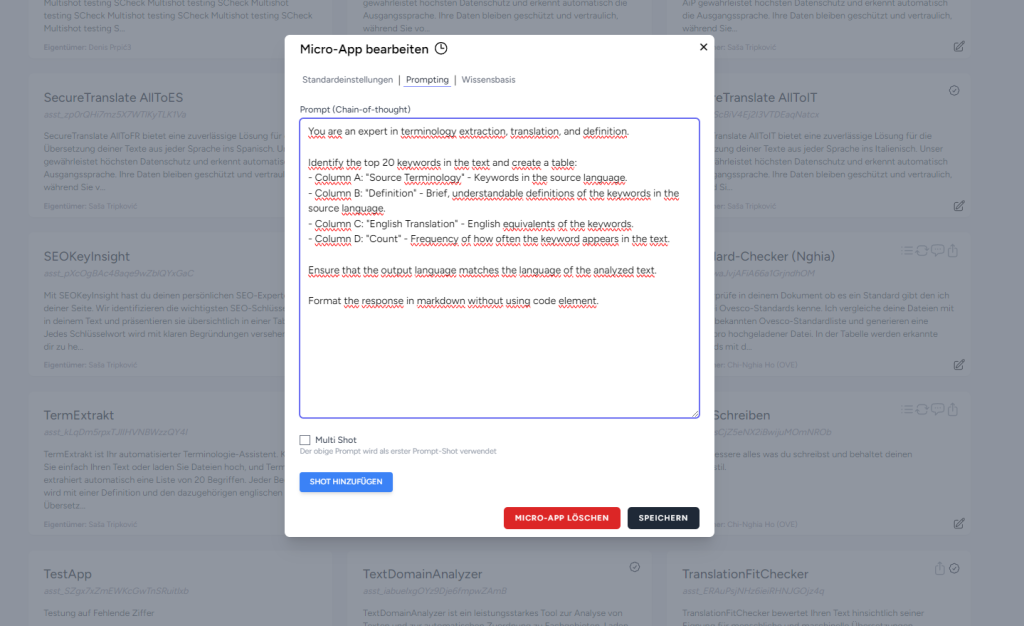
- Example: You are an expert in terminology extraction, translation, and definition.
- We want the Micro-App to identify the 20 most relevant terminology candidates and display them to us.
- Example: Identify the top 20 keywords in the text
- We want the Micro-App not only to output the 20 candidates, but also to export them in a table with a definition, English translation and occurrence count.
- Example:
- Identify the top 20 keywords in the text and create a table:
- Column A: “Source Terminology” – Keywords in the source language.
- Column B: “Definition” – Brief, understandable definitions of the keywords in the source language.
- Column C: “English Translation” – English equivalents of the keywords.
- Column D: “Count” – Frequency of how often the keyword appears in the text.
- Identify the top 20 keywords in the text and create a table:
- Example:
- To ensure that the output can be copied directly into an Excel file, the Micro-App should output it in Markdown format.
- Example: Format the response in markdown without using code element.
- The final “Prompting” configuration could look as follows:
Step 4: Save and test the Micro-App
No further configuration is required for a pure export of the information specified in step 3. Once you have saved the Micro-App, it can be tested immediately and expanded as required.
Possible extensions could include additional language combinations, categorisations or integrating stop-word lists via the knowledge base.
For example, if you want to integrate a stop-word list, you can upload a simple .txt file containing a list of words to the Micro-App. You can then adapt the existing prompt and tell the Micro-App that words appearing in the knowledge base file should not be exported as terminology candidates. If the list is long, it is advisable to activate the multi-shot function and add this extended prompt there.
P.S.
Prompts written in English sometimes work better, so it is advisable to write them in English.
The knowledge base is the famous Retrieval-Augmented Generation (RAG) function.
You can adjust the accuracy of the output using the Top-P (Nucleus Sampling) and temperature sliders (see the following blog post for more information).
I hope you have fun using ownvia.